I have built an off-grid text messaging system over amateur radio bands using Fldigi, because some jackwagon keeps digging up the only fiber optic line between my home and work, and I want to stay in touch with my family.
For text messaging to work, I need ringtones and text tones, otherwise how will anyone know when to check the computer for new messages?! The Fldigi website has a difficult to follow guide for how to accomplish this task spanned ovet two pages, which I will link below, before adding clarification.
http://www.w1hkj.com/FldigiHelp/audio_alerts_page.html
http://www.w1hkj.com/FldigiHelp/notifier_page.html
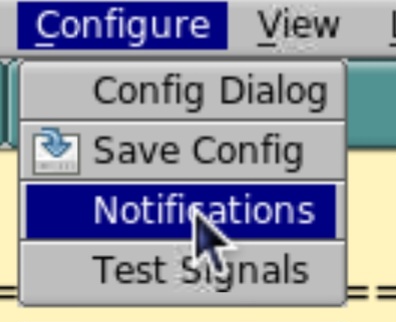
The first step is to open Configure | Notifications
In the event panel, select Custom Text Search, and enter the word or character you want to be your trigger for a ring tone or text tone. In this example I have simply used the word “ring”.
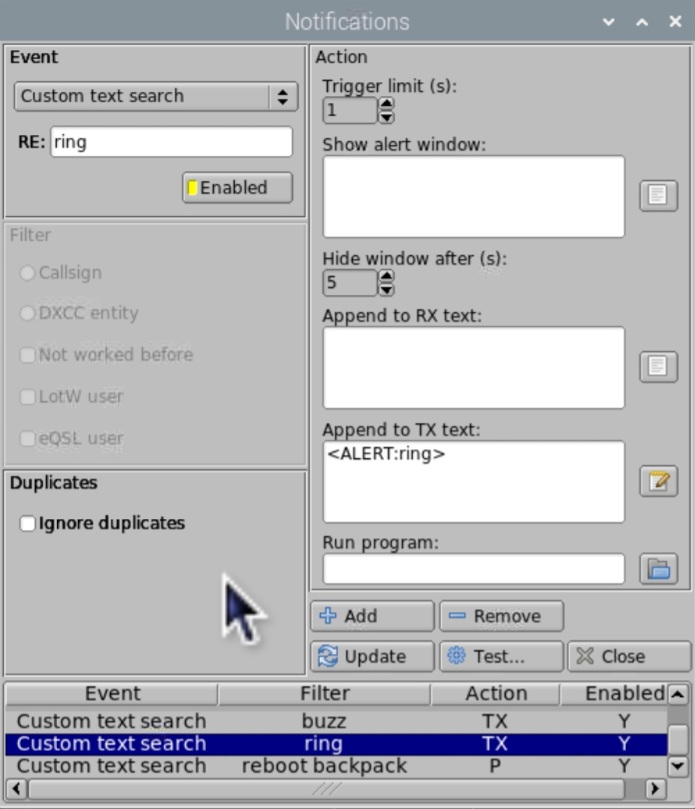
Uncheck ignore duplicates
In the Append to TX text window type what you see in the above picture (if I write it on this bulletin board, it changes the appearance of the code).
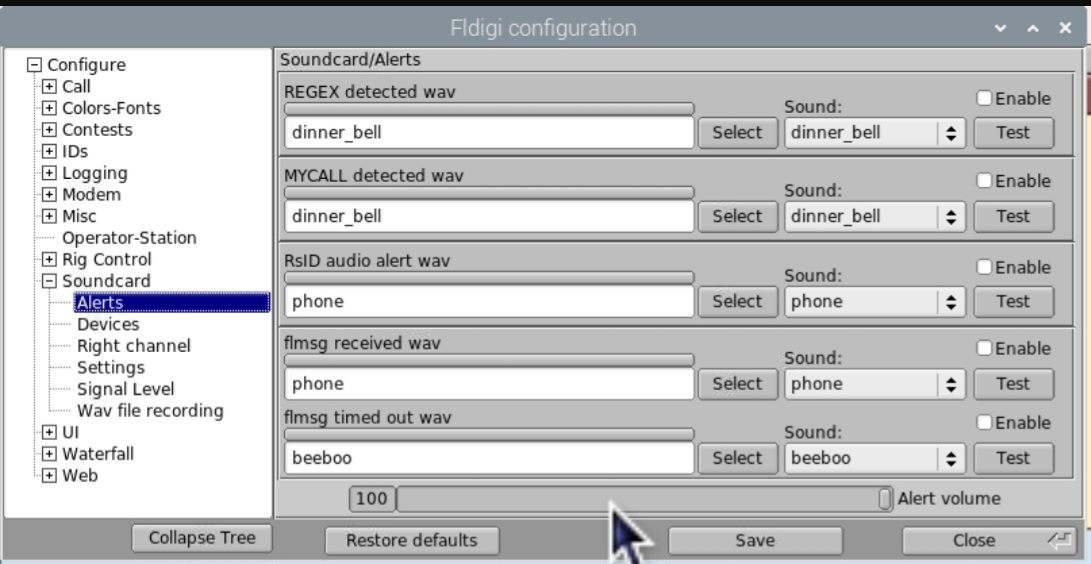
Fldigi comes packaged with several sounds, listed below. Instead of the ringing phone sound I used, type in any of the following .wav file names:
- bark
- checkout
- diesel
- steam_train
- doesnot
- beeboo
- phone
- dinner_bell
- rtty_bell
You could additionally use your own custom .wav file by simply pasting the file pathway in place of the prepackaged sound file name.
Click Add, and close the Notifications window.
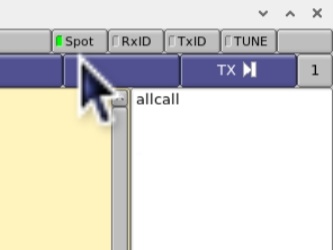
The next step is important. You must now click the spot button on the upper right of the main screen so that the little square turns green. You will not be able to click this button before completing the prior step of entering a custom notification in the Notifications menu.
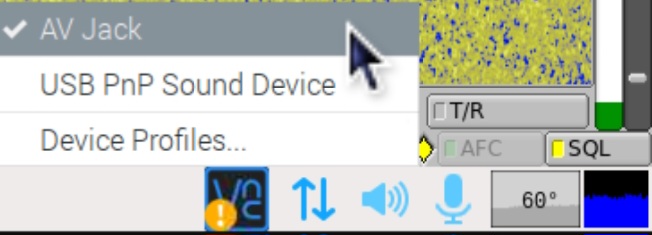
Now, decide how you will pipe put the sound to whatever device will play your ringtone. In this example I will use the AV headset jack. I have also successfully used HDMI. I’m using a Raspberry pi in this example. If youre using windows, you can skip this step. Right click on the volume setting and select AV Jack.
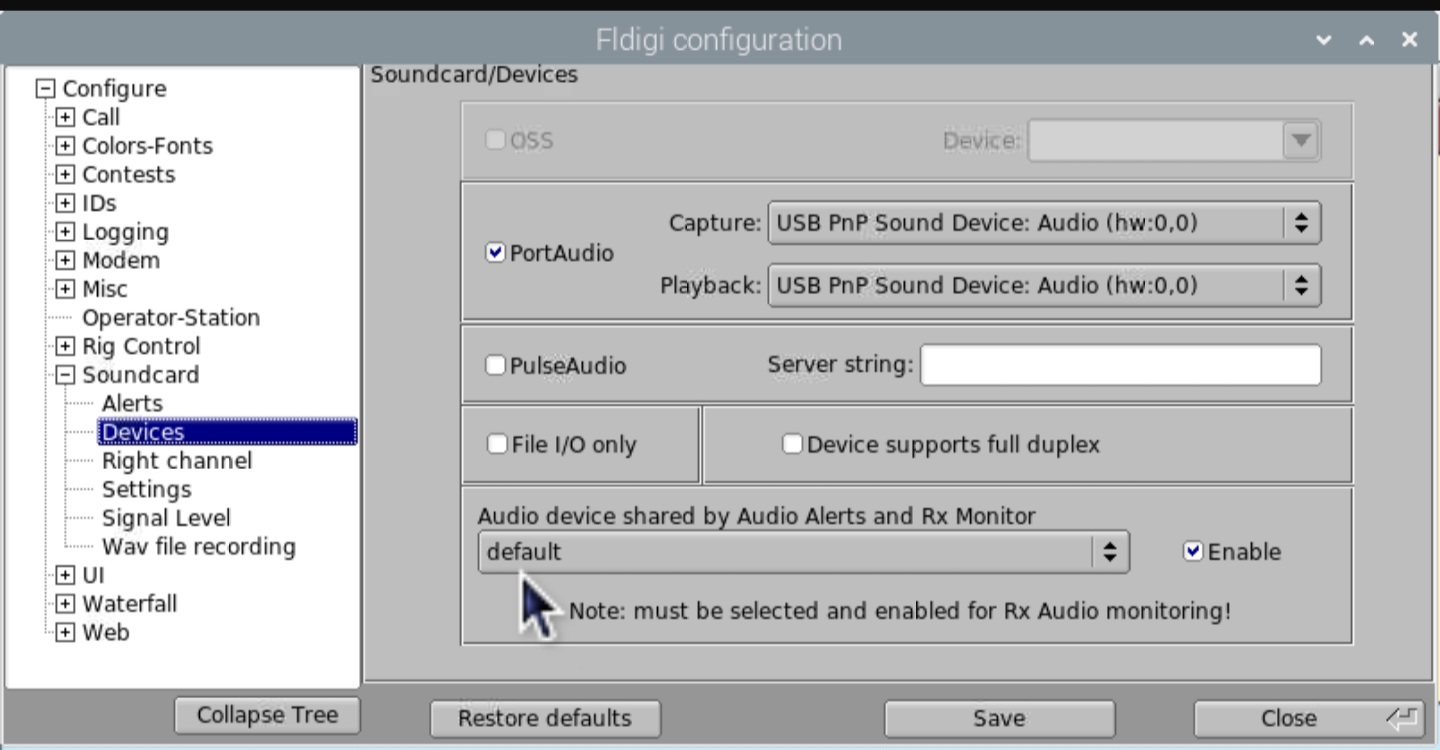
Now - windows and linux - go to Configure | Config Dialog | Soundcard | Devices. This is where you entered the digirig under PortAudio to make fldigi work in the first place. In this situation, we are concerned with the dropdown menu at the bottom labeled “Audio devices shared by audio alerts and RX monitor”. On Linux you’ll select the system default (you already selected the output in the last step). On Windows, you’ll select the preferred output here. Remember to click enable to the right, and save all changes. After saving, it’s good practice to close fldigi and reopen the program before trying out your new ringtones.
And that’s basically it. Theres an alerts menu right above the Soundcard menu in the Config Dialog, but you don’t need to check any of the selections there. If you want, you can use that menu to test sounds and and adjust the volume slider.